Tips for Getting Better Business Images on a DIY Budget
Let’s call this the “fake-it-til-you-make-it” photo tip sheet.
To be clear: We are proponents of professional photography for your website, and all of your marketing material. High-quality images attract attention, communicate clearly, and sell.
Simply put, professional photography makes you look better. The better you look, the more people will look. The more people look, the more leads you’ll see.
But professional photographers aren’t always available when photo ops present themselves. And, a professional photographer doesn’t fit in every small-business budget. Still, every business needs quality images.
Here, we offer general guidelines and specific tips to help you get better quality photos of your business, your people, and your products – on a “DIY” budget.
See more tips for photographing employees on the job.
What You Need to Know about Small Business Photography
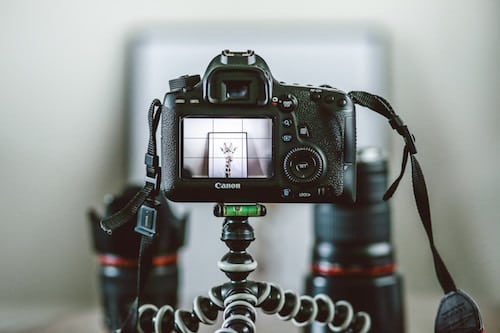
Equipment Matters. Photographers like to say the best camera you have is the one at hand – and that’s true, so plan ahead and use a real camera – or the best one you can get your hands on. If you must use your cell phone, follow this advice from TechRepublic. And no matter what kind of camera you use, use a tripod. (More on that later.)
Photography is the art of capturing light. So learn to use the aperture and white balance settings on the (best) camera you have. Also pay attention to color cast, and learn what temperature settings work best for your site. (Industrial lighting can be tricky, often turning images yellow or blue.) When framing your shots, notice shadows – and try to eliminate them. Generally speaking, shadows detract from your product images.
Closer is always better. The subject of the image should be obvious. You want to direct prospects’ attention so they look at and consider specific features of specific products. Nothing in the photo should distract from what you’re trying to sell.
Background Noise Detracts from your photos. Some tips to tune it out:
- First, look critically at the background when you frame a shot. If you can tell that a picture was taken in your break room, so can everyone else.
- Second, learn to use aperture settings to minimize depth of field. (Learn from the Fstoppers or see Nikon’s more artistic explanation.
- Challenging background? Some professionals recommend using a fog machine to blur the background, for example, when you need an image of a large machine in a shop setting and cannot isolate the machine or eliminate a distracting background. If that sounds too complicated, try creative lighting or professional post-processing. The point is to make it easy and pleasing for your viewers (prospects) to focus on what you’re trying to show (sell) them.
Remember, post-production is your friend. Many a photo has been saved by a little TLC on the back end. While very robust post-production software can run into the thousands of dollars, quite a few free, easy-to-use packages offer enough functionality to make your images look really good. (LunaPic and iPiccy are two nice, free options.) Standard post-production features to improve the quality of almost every image:
- Straighten the image. Unless your restaurant is the Leaning Tower of Pizza, your image should probably portray the subject straight, not at an angle.
- Remove or reduce shadows.
- Frame and format. Having each image the correct size (both file size and height/width ratio) makes a world of difference in the way your images, website, and handouts look.
- Crop. Crop. Crop. Less is more, and close-ups are generally better. Aim for less in the frame. Are you getting the picture? We hope so.?
5 Fast, Practical Tips For Improving Your Business Images
 Place a white sheet of paper under a product to get an instantly clean and bright background. Or use a piece of Plexiglas to create a nice reflection. Shopify offers more ideas to improve your business photography here.
- To improve lighting and reduce shadows, position two or three light sources on different sides of the product you’re shooting.
- Use compressed air to blow away dust particles, stray hairs, and anything that takes the focus (pun intended) off your product.
- Take pictures straight on – and if the resulting images are crooked anyway, use a photo editor to straighten it. The exception: when you’re taking pictures of people. In that case, some angles are good. Passports and mug shots are taken straight on – why draw comparisons?
- Use a Tripod. Sure, you’re steady Eddy. Use a tripod anyway.
 Place a white sheet of paper under a product to get an instantly clean and bright background. Or use a piece of Plexiglas to create a nice reflection. Shopify offers more ideas to improve your business photography
 Follow these tips and picture yourself increasing sales!
We’re marketing professionals, not professional photographers. If you need a business or corporate photographer, we are happy to recommend the business and corporate those that we work with. How can we help you improve your marketing programs and grow your sales? Let’s find out!
Sales Renewal’s insight:
Budget won’t support professional product or corporate photography? When you need to take your own business images, follow these tips to get better pictures for your website and for all of your marketing material.